Kefir: What is it?
One of those weird crazy things I had never heard of before I switched to real traditional foods. It's funny though, because now, it's one that I drink almost daily.
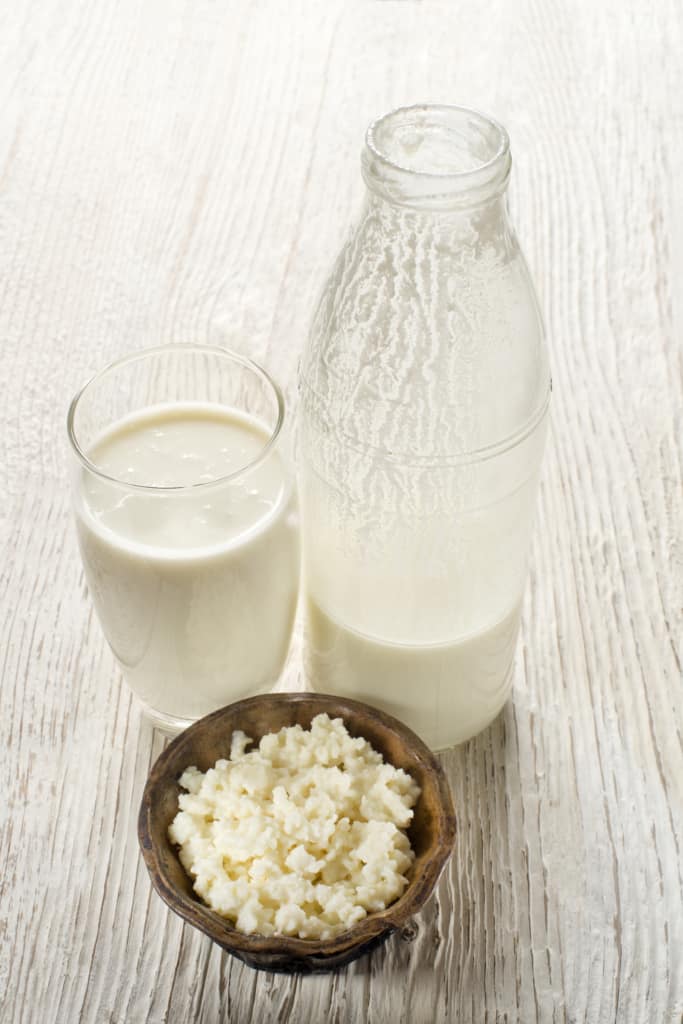
Kefir is a fermented/cultured dairy product that originated centuries ago in the Caucasus mountains, and is now enjoyed by many different cultures around the world. It's almost like a drinkable yogurt. It can be fermented using a direct set method, which is a powdered culture, or with kefir grains, which actually aren't grains at all. I prefer the grains.
Kefir contains highly beneficial bacteria and yeasts, is rich source of many vitamins, minerals, and amino acids. Fermented foods in general repopulate the gut with beneficial bacteria and can improve digestion, boost the immune system, and help heal leaky gut. Kefir is a SUPER charged fermented food and one of the best sources of probiotics out there. (source and additional reading)
Personally, since we have implemented kefir into our diets, along with a healthy diet, our "bowels" are all in better shape. *Ahem* I feel "lighter" when I drink kefir smoothies and have an easier time going to the bathroom. Kefir does originate from a Turkish word that literally means "feel good", and I can see why.
If you have an auto-immune disease, eczema, leaky gut, or your children have autism, you might benefit from milk kefir. Really, I feel that everyone can benefit from fermented foods. Those of you who can't tolerate dairy, don't feel left out friends. It can also be made from coconut milk, although periodically you'll need to put it back in dairy milk to keep them thriving.
Why would you want to make it at home instead of buying it?
Health Benefits:
At home kefir is much more potent, and will have many more probiotic strains that store bought. The benefits of homemade far outweigh store-bought.
Frugal and Renewable:
Also if you use kefir grains, you can make kefir for life. You can use the same grains over and over again. Plus they multiply so you can share them with friends. Homemade kefir is definitely more frugal than store bought. I also don't feel like I have to buy expensive probiotic supplements because I eat plenty of kefir, kombucha, and cultured vegetables. I like the money saving option that homemade kefir provides.
How do you make it?
The process is super easy. Essentially, you just pour milk over the grains, let them sit for a day, and strain the kefir from the grains.
Step by step process:
1. Obtain kefir grains. They look almost like small little pieces of cauliflower. You can get them from a friend that makes kefir, because they multiply. You can also get them online dehydrated from Cultures for Health. I got mine last year from Cultures for Health when they were having a 15% off sale.
2. Place your kefir grains in the bottom of a jar. I use about 1-2 T. of grains per 2 cups of milk.
3. Pour milk over the grains. Again I use about 2 cups of milk, but you can adjust according to how many grains you have. Let sit for 24 hours on the counter top.
4. After the 24 hours, the milk should be thickened and should have a pleasantly sour yet yeasty smell. You want it to be thickened but not separated into curds and whey.
5. The next day, gather your straining materials. I use a plastic fine mesh strainer that I got with my kefir kit from Cultures for health, and a bowl to catch the strained kefir.
5. A little at a time, pour the kefired milk and grains in the mesh strainer and work through using a spatula or spoon. Don't worry about breaking the grains. They are durable, feel almost rubber-like, and it's ok if they break up a little anyway. The kefir will fall in the bowl and the grains will be left in the strainer.
That's it! Repeat the process all over again day after day to receive huge probiotic benefits from your homemade kefir.
You can use the kefir right away in a smoothie or other recipe that calls for kefir, or you can refrigerate it for about a week.
Billy
Love how easy you make it look to make milk kefir! Can't wait to make this at home!
Fitoru Keto
I'm planning on trying this tomorrow and I'm so excited about it! Thank you so much for sharing!